How to use a crypto card for cloud storage billing

You can pay a cloud storage bill with a crypto card: fund the card, add it as a payment method in your account, and let the provider charge it like any other card. This guide walks you through three steps — getting and funding the card, adding it to billing, and managing charges.
Key Takeaways
Fund your crypto card with USDT and set a spending limit to control costs.
Add the virtual card as a payment method in your cloud provider's billing page.
Use card freezing and separate cards per project to manage usage-based bills easily.
Cloud services that accept a crypto card
How card payments work
A crypto card works by converting your crypto into fiat at the card level. The cloud provider never touches crypto — it receives a normal card payment, just like any other charge. That's the key detail to understand. Google Cloud does not directly accept cryptocurrencies for payment, so a crypto-funded virtual card must serve as your billing method. Google Cloud does support credit and debit cards, including physical or virtual cards such as a crypto card.
The same approach covers bills from providers such as AWS and GCP. You add the crypto-funded virtual card as the billing method, and the charge clears through the card network in dollars or another fiat currency. Your crypto balance covers the spend behind the scenes. From the provider's side, nothing looks unusual.
Checking provider support
Before you commit, confirm that your provider accepts the card network your crypto card runs on. Most major cloud platforms process standard card payments, so a virtual card usually fits without special arrangements. Check the billing settings page for accepted card types and any regional restrictions. Support pages and billing documentation list the accepted networks, and a quick chat with support settles any doubt.
A small first bill or a test charge confirms the setup works. If the provider rejects the card, the issue is usually the card type or a verification step, not the crypto itself. Keep a backup payment method on file during the first billing cycle, so a declined charge doesn't interrupt your storage service. Once the first charge clears, you can remove the backup.
Setting up your UUPAY crypto card
Funding and limits
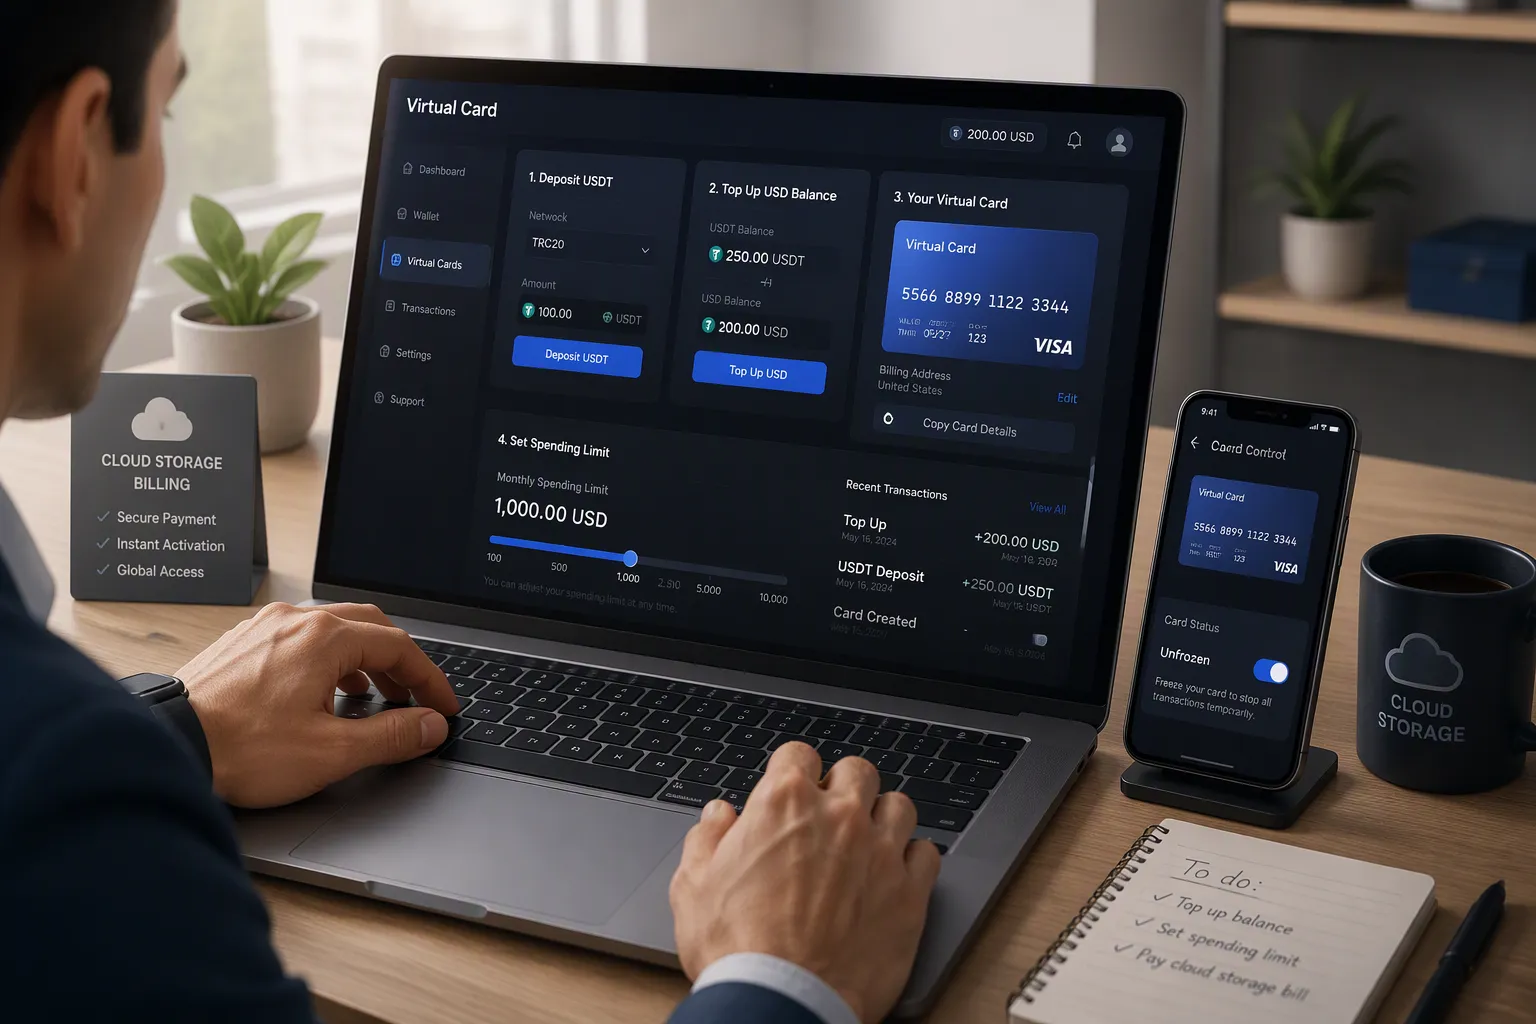
The funding flow is straightforward, and you can complete it in a few minutes. First, you deposit USDT to the card provider. Next, you move the amount you need to the card's USD balance. Once the balance is topped up, you use the virtual card details at checkout. That's the whole process — no separate conversion step on your end, and no need to hold fiat before you start.
UUPAY makes the entry point easy. New users can open a virtual card for 1U and get 1U cashback, so the first card costs you effectively nothing. Top-ups are fee-free for all users during the current promotion, which means moving funds to your USD balance adds no extra cost. Set a spending limit that matches your expected cloud bill. A limit keeps your exposure predictable and stops a surprise charge from draining your balance. Start with a limit close to your last bill, then adjust after the first cycle.
Mastercard's Crypto Card Program enables crypto cards to be used across more than 100 million acceptance locations. That reach matters for cloud billing, since major providers process standard card payments. UUPAY also offers a physical card with global acceptance and up to 50% cashback, which suits readers who want one card for both cloud bills and everyday spending.
Fees and controls
Beyond the card itself, UUPAY bundles extra services: hotel and flight booking, eSIM, and chat. These don't affect your cloud billing, but they make the card more useful day to day. The compliance side is worth noting too. UUPAY holds a US MSB license, Swiss and Canadian licenses, a Brazil application in progress, and a Hong Kong registration. That framework matters when a cloud provider verifies your payment method, because a licensed issuer gives the provider a clear paper trail.
Controls give you the final say. You can freeze the card instantly if a bill looks wrong or your usage spikes. Unfreeze it when you're ready to pay. This freeze-and-pay habit works well for usage-based storage bills, where the amount changes each month. UUPAY also runs a referral program with commissions up to 50% based on invitations, which offsets card costs if you bring in other users.
A crypto card fits cloud billing best when you treat limits and freezing as part of your routine. Check the balance before each billing cycle, keep the limit slightly above your typical bill, and freeze the card between charges if you prefer tight control. That routine takes a minute and prevents most billing surprises.
Adding your card and managing bills
Adding the card to billing
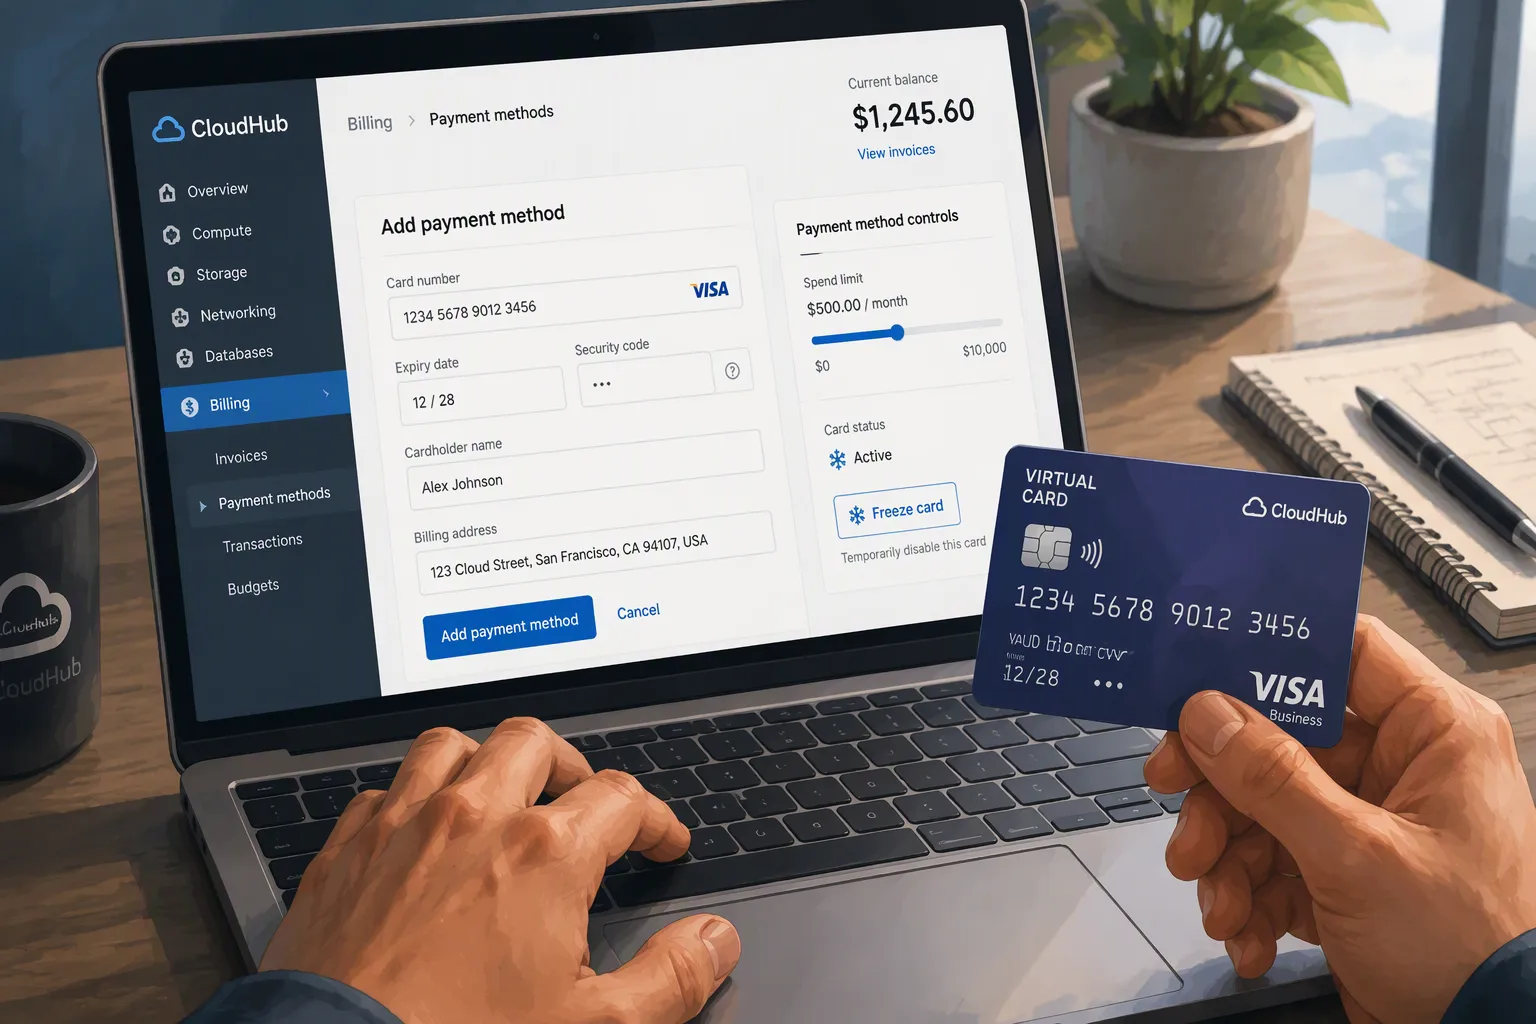
The setup itself takes only a few minutes. You enter the virtual card details in the cloud provider's ordinary online checkout, exactly as you would with any other card. Here is the sequence:
Open the billing or payment methods page in your cloud console.
Choose to add a new card and type in the virtual card number, expiry date, and security code.
Confirm the billing address tied to your card account.
Save the card as your default billing method.
Run a small test charge or wait for the first invoice to confirm the card clears.
This flow works with AWS, GCP, Azure, Vercel, and most other platforms, because each one processes a standard card payment. You do not need to mention crypto anywhere in the checkout.
Managing usage-based bills
Usage-based storage bills change every month, so a fixed budget is hard to predict. A per-card spend limit solves that problem. Set a limit per provider or per project, and your cloud charges cannot exceed that budget, even during a traffic or compute spike. One card per provider or project keeps each bill separate and easy to track.
Freezing adds a second layer of control. When a project ends, freeze the card and billing stops immediately. You can unfreeze it later if you restart the work. This habit prevents forgotten subscriptions from quietly draining your balance.
Think about how you split your cards. A single crypto card works fine for one storage account. If you run several projects, issue a separate card for each one. That way a spike in one project never touches the budget of another, and you can spot which service costs the most at a glance.
Check your balance before each billing cycle. Keep the limit slightly above your typical bill, so a normal month clears without a failed payment. If a charge looks wrong, freeze the card first and review the invoice before you unfreeze it. That one-minute routine handles most billing surprises.
Fund your UUPAY crypto card, add it as a payment method, then manage bills with limits and freezing. That's the whole routine.
Check provider support and card limits before your first charge. A quick test bill confirms the setup, and you can adjust from there.
FAQ
Do I need to tell my cloud provider I'm paying with crypto?
No. The card converts your crypto to fiat before the charge reaches the provider. They see a normal card payment, so you skip any crypto disclosure at checkout.
What happens if my card balance runs low during a billing cycle?
The charge may fail and your storage service could pause. Check your balance before each cycle, and keep your limit slightly above your typical bill to avoid a declined payment.
Can I use one card for several cloud projects?
Yes, but separate cards work better. Issue one card per project, set a limit on each, and a spike in one project won't touch another project's budget.
See Also
Simple Steps To Obtain Your Own Crypto Card
How To Purchase Cryptocurrency Using A Credit Card
A Guide To How Crypto Debit Cards Work
